- This page is about the unit. For the shield itself, see Shield.
| Stand Alone | ||||||||||||||||||||||||||||||||||||||||||||||||||||||||||||||||||||||||
|---|---|---|---|---|---|---|---|---|---|---|---|---|---|---|---|---|---|---|---|---|---|---|---|---|---|---|---|---|---|---|---|---|---|---|---|---|---|---|---|---|---|---|---|---|---|---|---|---|---|---|---|---|---|---|---|---|---|---|---|---|---|---|---|---|---|---|---|---|---|---|---|---|
| ||||||||||||||||||||||||||||||||||||||||||||||||||||||||||||||||||||||||
| Factory Add-on | ||||||||||||||||||||||||||||||||||||||||||||||||||||||||||||||||||||||||
| ||||||||||||||||||||||||||||||||||||||||||||||||||||||||||||||||||||||||

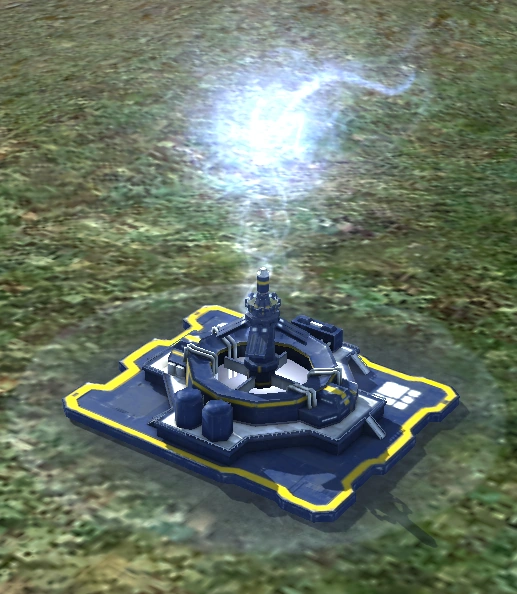


The Shield Generator is a defensive structure, which provides cover against enemy fire, to all units under the barriers spherical radius. However, both friendly and enemy units can traverse through the shield barrier itself. The shield requires no energy to maintain, but cannot be shut off. After losing all its health, the shield will shut down and recharge, then reactivate.
Differences between Factions[]
An early analysis shows that the UEF Shield Generator appears to be the most effective, possessing 10,000 health and 100HP/s regeneration rate.
The Illuminate Shield Generator lacks in recharge rate, while the Cybran one proves to be least effective in both categories.
That is not the whole story however. Cybran and Illuminate shields function a little bit differently than UEF shields. UEF shields block 100% of incoming damage. Cybran and Illuminate shields stop 85% of damage, and allow 15% through (though it is often deflected entirely).
On the surface that sounds like UEF shields are markedly better. However, UEF shields suffer a significant drawback in that incoming fire with an AOE will damage all of the shields protecting that area. Cybran and Illuminate shields however, when hit by AOE weapons, only the shield bubble that takes the direct hit takes 85% of the damage, and any other stacked shield bubbles would only take the 15% that gets through the first bubble.
This is why the Aegis Shield generator was a necessary addition to the game. The UEF shield generators whilst very effective against direct fire, are woefully inadequate to defend against a mediocre artillery bombardment since they cannot be effectively stacked.
Changes from Supreme Commander 1[]
- Unlike the old shield generators, these shields are different in that some artillery shells and missiles will penetrate the shield, although deal significantly reduced damage while other, generally high velocity shells, will reflect and bounce off of the shield.
- The visual appearance of the shield has been standardized between the factions.
Factory Add-on[]
The Shield generator add-on adds a small force field to a basic factory once it is built that can absorb incoming fire that can either reduce or eliminate any damage dealt to it until it runs out of charge. The force field only covers a small area around the factory, about 4-5 blocks at widest points and only 2-3 blocks in the corners. Unlike other add-ons, the power of the field depends on the factory, and not the add-on. The shield add-on is frequently used in the early game to shield point defense, because the shield is relatively small compared to its stand-alone counterpart, it is very hard for an attacker to get his units under the shields, so in most cases the attacker is forced to take out the shield first (with mobile missile launchers) and then the point defence.
Strategy and Tips[]
Offence[]
- Enemy units outside a shield will have their fire intercepted by the shield, however once they have moved inside the shield they can destroy the generator directly. Move your units aggressively to take out enemy defenses.
- Bombers fly too high to be able to enter an enemy's shield. They must attack the shield and disable it before attacking the generator.
- Gunships fly low enough to be able to enter an enemy shield to attack the generator directly.
- Experimental air units make an ideal counter for shields: they fly low enough to enter a shield sphere. They provide enough firepower to destroy shield generators almost immediately upon entering the shield.
- Additionally they have enough health and armor that opposing defensive weapons will likely be unable to destroy the unit before it reaches its target.
Defence[]
- Multiple Shield Generators can shield each other. Layer them so even if an enemy does move into a shield, the generator is protected by a secondary shield.
- All shields covering a single unit or building must be deactivated before the target can be affected. En-mass your shields on your important structures to defend them.
- Nukes ignore shields and obliterate everything in a wide radius when they detonate. Do not rely on shields alone to defend your base in the late game. However shields do reduce damage from a nuke so anything that would survive will have more health and anything that would almost survive will.
- Point Defenses should typically be placed just inside the shield. This minimizes the space available to enemy units to move inside the shield radius, while maximising the defensive firing range.
- Shields are effective defense against artillery fire, provided sufficient shield generators come online before enemy artillery can destroy them. With several overlapping shields, enemy artillery progress can be ground completely to a halt, negating all damage they would otherwise dealt. This is because the shield generators will automatically recharge and regenerate faster than the artillery will damage them.
- Beware that the UEF Disrupter Stations EMP effect can easily knock out large groups of shields.
- Some people have reported that if enough shields are densely packed, a nuke can literally be absorbed without damaging any structures. However, this is very hard to pull off due to the high amount of shields required and the probability that the nuke will land near it.